This blog post will introduce you to the Webflow Data API and point you to all the relevant documentation to help you get started.

The Weblow Data API allows you to read and update content on your Webflow site. In this blog post, we will review the Webflow API basics and help you get started managing your site’s content with the Data API.
The Webflow API is a REST API that allows you to query data about your site’s CMS collections, pages, forms, e-commerce products, users, and more. Besides querying data, the API allows you to update or add new data. For example, you may use the API to add blog posts or e-commerce products from an external source. Or you may use the API to sync product availability between your internal systems and Webflow.
This blog post looks at the Webflow Data API, a REST API to manage your site’s data. Webflow also has a Designer API, which allows developers to build extensions that integrate directly with the Webflow Designer, for example, to manage elements, properties, styles, etc, on the Designer canvas. We will not look at the Designer APIs in this blog post.
The best place to get started with the Webflow Data API is the API reference section of the Webflow Developer portal. The API reference will give you information on the Webflow API basics, such as authorization, scopes, rate limits, etc., and all the endpoints you can call from your application.
Let’s dive into this deeper and start off by discussing the top navigation section.
 At the time of writing this blog post, the top navigation consists of the following sections:
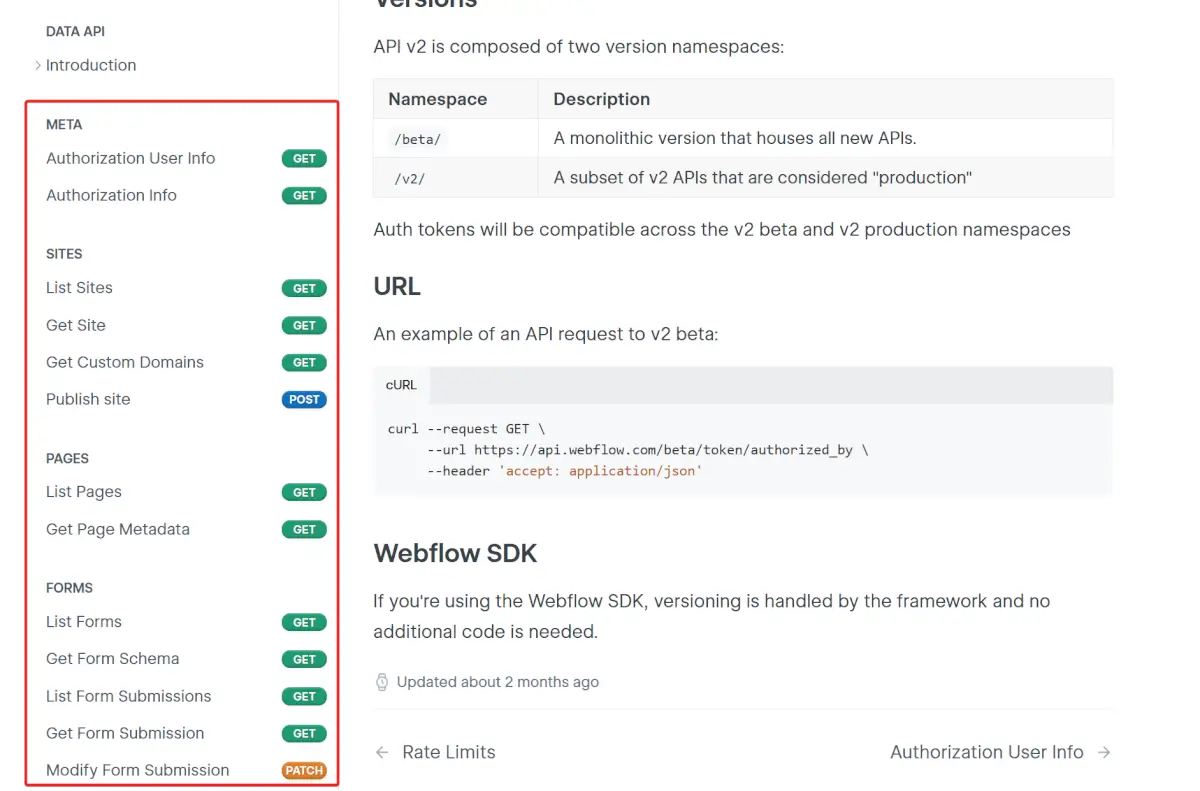
v2 namespace and thus start with the URL https://api.webflow.com/v2.beta namespace and start with the URL https://api.webflow.com/beta.The side navigation for the Data API starts with an Introduction section. This section contains information about the API structure, authorization, scopes, versioning, etc. It is suggested that you read through these sections first, as they contain important information about using the API.
 After that, you will find the navigation for all the individual API endpoints, categorised by section. For example, there will be a section for all endpoints related to working with Sites. Another section will contain all endpoints related to working with Pages. Etc.
You can get information about a particular endpoint by clicking on the endpoint in the sidebar navigation.
 The endpoint information page contains the following sections:
The Webflow Data API website allows you to test the various API endpoints inside your browser before integrating them into your application. This allows you to view the responses of the API endpoints against your personal Webflow data and verify that the endpoints can retrieve and update the data as per your expectations.
To try out an API endpoint, you must go through an authentication process that will generate a Bearer token for authorizing your API requests.
Click on the Authenticate button.
 This will take you through the normal OAuth 2.0 authorization flow and prompt you whether you want to allow the Webflow Developers Site access to your account. Select the sites you want to give it access to and click the Authorize App button.
 You will be redirected to the endpoint page, and the Bearer token will be filled in.
 Click the Try It! button to test out the API call. The API call will execute, and the response window that previously contained a sample response payload will contain the real data from your site.

Using the Data API in your application will depend on your programming language, so it is not practical to give a step-by-step guide in this blog post. Instead, I will give you high-level steps to guide you through this process.
The first step is to register your application in your Webflow workspaces. This is required to obtain a Client ID and Client Secret required for the OAuth 2.0 authorization flow. You can find a step-by-step guide in the Webflow Authorization documentation.
You can use the Client ID and Client Secret from your app registration to initialize an OAuth 2.0 flow. This will ultimately give you an access token that can be used to call the various API endpoints on behalf of the user.
The access token will be passed as a Bearer token in the Authorization header of your API requests. Once again, more information can be found in the Webflow Authorization documentation. Most programming languages have first-party or third-party libraries to execute the OAuth 2.0 authorization flow. I suggest searching for “oauth 2.0 with [your programming language]” on Google or YouTube.
Next, you can call the API endpoints and pass the access token you obtained previously as a Bearer token in the Authorization header. The Webflow API documentation contains code samples for the most popular programming languages.

By default, only users from your Webflow Workspace can use your application. If your application is for internal use, this will not be a problem. However, if you want the application to be available to users outside your organization, you must submit the application for approval.
To enable the OAuth 2.0 application you registered in Step 1 to be available to users outside your Workspace, you must submit the application for approval.
You can find more information on the Marketplace Guidelines and process for Listing your App in the Webflow documentation.
Let’s look at some common questions regarding the Webflow API to close this blog post off.
Yes, Webflow has a Data API that allows you to manage the data in your Webflow site, such as pages, CMS collections, users, etc. Webflow also has a Designer API which is a Javascript-based API that allows you to develop extension that enhance the functionality of the Webflow Designer.
Yes, the Webflow API is free to use.
If you intend to make your application available to users outside your Webflow Workspace, you must go through the Marketplace approval process. For internal apps, i.e. apps used by users in your Webflow Workspace, no approval is required.
Yes, the default rate limit is 60 requests per second. You can find more information in the Webflow rate limits documentation.
Yes, the Data API can be used to manage CMS items.
Manage your CMS content at scale.